Home Innovations
Our aim is to educate people how easy hydroponic gardening is. It can be as simple as utilising household items that would otherwise be thrown into the rubbish.
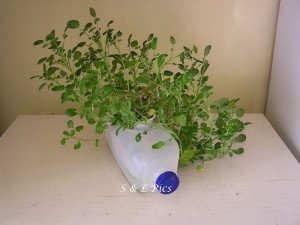
2 Litre Milk Bottle
A two litre milk bottle is a typical example of how one can easily grow herbs on the window sill.
This idea was also incorporated by us in a Nursing Home, where each of the residents that participated had their own Portulaca seedlings in their little mini garden. Providing 3 months of enjoyment from the flowers, simply by using something that they could easily manage themselves.
The milk bottle acts as the reservoir that is closed over, thus preventing loss of water through evaporation.
This is a quick and easy means to experiment growing hydroponically.
Firstly what you need:-
- Clean 2 litre milk bottle with lid
- Disposable coffee cup
- Cupful of media(we use perlite)
- Seedling of choice ( picture shows watercress )
- Some nutrient in water (if you can just use Thrive).
Lay the milkbottle down on one side and cut a hole (we used a holesaw) on the side facing up – topside. Make the hole large enough so the cup will sit approx. ¾ of the way down into the bottle.
Punch about 4 – 5 holes around the base of the disposable cup. Put your media that you wish to use in the cup and plant the seedling into this.
Then fill your reservoir (milk bottle) with water and nutrient/ fertilizer/ thrive solution (whatever your choice may be).
Sit the cup in the hole.
You now have your mini garden. The perlite (media used) will act like a wick and draw the water/nutrient solution up to the roots of the seedling. Over time the root system will go down through the small holes in the base of the disposable cup into the reservoir solution.
Sometimes the nutrient solution inside the reservoir may go green. This is because the sunlight is getting through the plastic and creating algae. Don’t worry it will not harm your plant. Some people may dislike the unsightliness of algae. If you’re one of these folks then be creative and paint your milk bottle or make it a little cover.
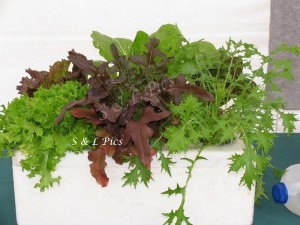
Foam Box
Utilising foam boxes is another way of growing with hydroponics. The size used by supermarkets for broccolini or snow peas is ideal. Larger boxes can be used – this will be covered further on.
By using the lid as a cover you can create a reservoir with the base for the nutrient. Simply by cutting 6 to 8 holes (hole saw works wonders) large enough that you can sit a disposable plastic cup in it without falling through.
Pierce approx 4 – 5 holes around the base of the plastic disposable cup and fill it with perlite (or media of choice) and place your seedling into the media.
Fill the base of the foam box with the nutrient solution, place the lid on and pop your cups with seedlings into the holes in the lid. Your media will act like a wick and draw the nutrient up to the roots of the seedling. This is a great way to grow lettuce. By picking the leaves from the outer bottom, the lettuce will continue to grow without bolting. The nutrient solution will last a lengthy time without having to be constantly replenished, as there is no loss of moisture through evaporation.
Many items we use around the house that quite often we throw out can be utilised. People don’t realise that growing hydroponically doesn’t have to be expensive. You don’t have to spend thousands to be productive and grow your own vegetables.

By using deeper foam boxes and a single small hole drilled in one end about 1 inch up from the base, you can place your media in the box and use it for planting and growing many plants. For example carrots and beetroots as the depth allows for their taproots to go down.

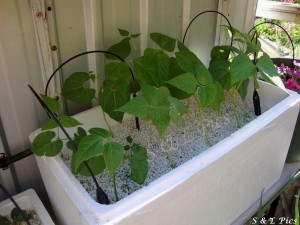
A lesser depth of media in the box and you can still grow other plants like beans, chives, turnips etc., it is really just up to what you want to grow.
Household Buckets
Ordinary household buckets are another to have a little garden on the cheap. By simply drilling one small hole through the side of the bucket about 1 inch up from the base, putting your media into the bucket and plant your seedling. You can water manually, when the water starts to trickle out of the hole on the side of bucket you know that your base reservoir is full
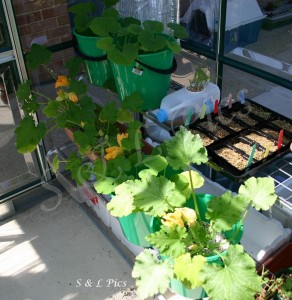
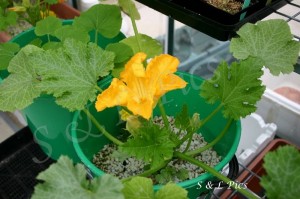
Squash, Pumpkin and Zucchini all going well in bucket system.
Tomatoes do just as well grown in a bucket, although you may wish to place a well anchored stake in or close by for plant support so the plant won’t fall over as it gets bigger.
Small Utility boxes
An easy way to grow strawberries if you don’t have a lot of space is by using those small utility boxes, available at most hardware outlets.
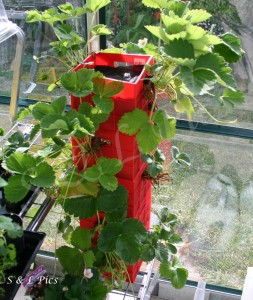
They are great as they stack on top of each other. Drill one hole in the centre of the base of each one, fill with perlite and on alternate sides push the strawberry plant carefully through covering the root system with the perlite. Place an old ice-cream container underneath to catch any surplus solution that isn’t taken up by the media or plant. Water manually with your nutrient mix from the top. You now have a very simple version of flood and drain. Plus you can re-use the caught run off from the catchment container underneath.
PVC Piping (Plastic Downpipe)
Ever had a piece of pvc piping lying around and wondered why you keep it.
Use it as a garden.
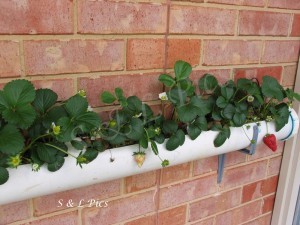
Put a couple of end caps on and cut out a strip along the side wide enough that you can put your media and seedlings into.
Avoid using the old galvanised downpiping though as it has a tendency to react with the nutrient solution when feeding your plants.
You can water manually, or if your a bit more inventive using a drip system.
We hope that these examples may encourage you to be a little bit inventive.
If you can’t afford to set up with shop supplied systems, get yourself going and growing on the cheap.
It’s the first step of an exciting journey.
Not to mention the sense of self satisfaction one can achieve.
